Setting up Microsoft Word to print your National Record of Achievement Personal Statement
| Important: Read all of these instructions before starting to type your Personal Statement. |
1 Start Microsoft Word as normal. Make sure you are using a 12 or 14-point font to type your Statement.
2 Click on File, Page Setup and then on Margins (at the top of the dialogue box that appears). Change the margins as follows:
- Top: 4.9cm
- Left: 1.5cm
- Right: 1.5cm
- Bottom: 4cm
| Tip: If your copy of Word is displaying measurements in inches (with the " symbol after the numbers), type the measurements exactly as shown here with the letters cm after them. Word automatically recognises this as centimetres. |
3 Click on the Paper Size tab (at the top of the dialogue box) and make sure it is set to A4. If it is set to anything else, change it using the drop-down menu.
4 Click on the OK button at the bottom of the dialogue box.
5 Press the Tab key twice (or, alternatively, press the Space Bar about twenty times) and then type your name.
6 Press the Return key twice and start typing your statement. Remember to save it frequently as you type.
7 When you've finished and checked your work carefully, print a copy on blank paper before you try printing on to your Personal Statement paper. Not all printers line up perfectly with the measurements you've entered into Word, so print a copy on plain paper, place it behind the Personal Statement paper, and hold it up to the light to make sure it lines up correctly. If it doesn't, use a ruler to measure how many millimetres up or down you need to adjust the top margin and then repeat step 2 above using this new measurement.
8 If you're happy with the alignment of your test print, you're ready to print on the Personal Statement paper. Click on File, Page Setup as before, and then on the Paper Source tab. Change the First Page setting to Manual Feed. Click on OK at the bottom of the dialogue box.
9 Now click on File, Print and OK to send your document to the nearest printer. The printer will not print immediately -- instead, look for a green light flashing on the top of the printer, which indicates that it is waiting for you to insert your Personal Statement paper.
10 Open the manual feed tray on the printer (refer to the diagrams if you are unsure how to do this) and place your Personal Statement paper head first, face up, between the two side guides. If the guides are too wide, push them together gently so that your Personal Statement paper feeds in straight. 11 After a few seconds the printer will take your paper and print on to it. Close the manual feed tray after use.
|
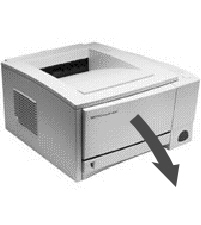 HP 2100 printer (small) |
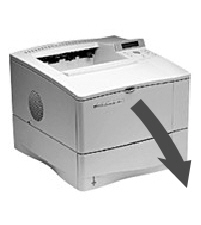 HP 4050 printer (larger) |